
Battery buyers often see a dramatic image of a nail driven through a cell and assume the result tells the whole story. It does not. A Nail Penetration Test is a destructive abuse test, and its findings depend on the cell design, test conditions, and measurement methods. Small changes in nail diameter, penetration speed, or state of charge can affect what happens next.
This guide introduces five test methods buyers may encounter when comparing battery suppliers and laboratory reports. They include variations in penetration setup, sample preparation, temperature control, and data collection. Each approach can reveal different details, such as voltage change, surface temperature, venting, or signs of thermal runaway. The details matter. A report that says “passed” without describing its conditions may leave important questions unanswered.
Buyers should look for clear procedures, calibrated equipment, repeatable results, and transparent reporting from qualified test facilities. They should also check whether the tested sample represents the battery they plan to purchase. A result from one cell format or production batch may not apply to another. Even a careful test has limits. It cannot predict every real-world failure, and the evidence can be messy. Use the five methods as a framework for asking better questions, not as a shortcut to declaring one battery universally safe.
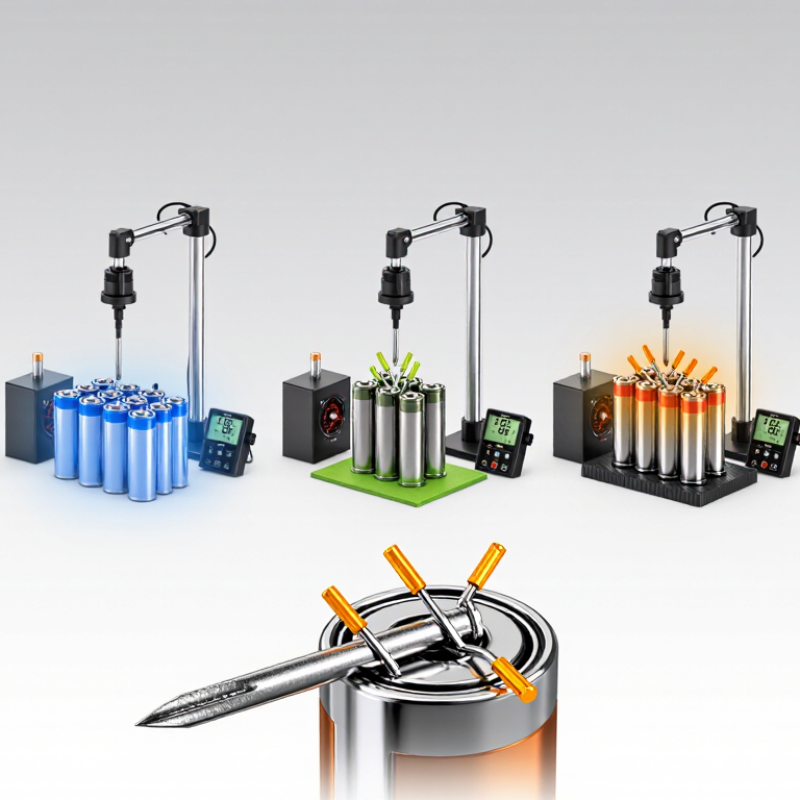
A nail penetration test can provide a useful baseline for cell safety, but only when the conditions are clearly defined. Results depend on the cell’s state of charge, temperature, nail dimensions, penetration speed, and test location. Keep these variables consistent when comparing samples. Small details matter.
Record what happens after penetration, not just whether the cell vents or catches fire. Note temperature changes, smoke, voltage loss, and the time to any visible reaction. Use the same observation period and measurement setup for each cell. Testing belongs in a properly equipped laboratory under trained supervision. A single successful result does not prove that a cell is safe in every pack or operating condition.
Standardization improves repeatability, but it cannot capture every real-world failure. Cell aging, manufacturing variation, and pack design may change the outcome. That is not enough. Buyers should review the test protocol and raw observations, and ask whether multiple samples were tested. I would treat unexplained differences between nominally identical cells as a reason to investigate, not dismiss.
Battery nail penetration results can shift when the nail moves faster, tilts, or changes diameter. For meaningful comparisons, buyers should record nail material, tip shape, diameter, travel speed, penetration depth, and fixture alignment. A slow, measured drive is not automatically safer or more representative; it must match the chosen test procedure. Keep the cell orientation and support surface consistent, too. Even a slight tilt can change the puncture path and make two cells less comparable.
Tips: Ask for speed in millimeters per second, not “fast” or “slow.” Check calibration records and confirm how speed is measured. Photograph the nail and fixture before each test series. Small details matter.
Geometry deserves equal attention. A sharp cone and a blunt point create different contact areas, while nail diameter changes the displaced material and load. Request exact dimensions, not only a verbal description. Review raw time, voltage, temperature, and force data alongside the final pass/fail label. Tightly controlled conditions improve repeatability, but they cannot represent every real-world event. I would question any report that omits deviations; a minor setup error may explain an unexpectedly neat result. Ensure trained staff use a suitable test enclosure and documented procedures.
| Test method | Nail variables to control | Other conditions to hold constant | Record for each test | Best use for buyers |
|---|---|---|---|---|
| 1. Fixed-parameter baseline | Nail material, diameter (mm), tip profile, exposed length (mm), penetration direction, and insertion speed (mm/s). | Cell format and dimensions, state of charge (SOC, %), starting temperature (°C), fixture, and test endpoint. | Peak and time-resolved voltage, temperature at defined locations, visible venting or fire, and time to each event. | Compare repeat samples or suppliers using one documented protocol. Keep the nail and setup identical across the comparison. |
| 2. Nail-speed sensitivity | Use the same nail material, diameter, tip profile, path, and penetration depth; vary insertion speed (mm/s) between test groups. | Keep cell type, SOC, temperature, fixture, and nail-to-cell alignment unchanged. | Actual speed and penetration depth, voltage response, temperature rise, and observed safety outcome. | Assess whether conclusions depend on insertion speed. Report measured speed, not just the equipment setting. |
| 3. Nail-diameter sensitivity | Vary nail diameter (mm) while keeping material, tip profile, insertion speed, direction, and penetration depth consistent. | Use cells from the same defined population and keep SOC, temperature, support, and test endpoint consistent. | Measured nail diameter, insertion force if instrumented, voltage and temperature traces, and safety outcome. | Check how a change in nail cross-section affects results. Do not compare diameter groups if other nail geometry also changes. |
| 4. Tip-profile or nail-material comparison | Change one factor at a time: tip profile or nail material. Document the profile and material; keep diameter and speed fixed where practicable. | Keep cell format, SOC, temperature, penetration path, fixture, and depth consistent. | Nail specification, insertion force if measured, penetration depth, voltage and temperature response, and observed outcome. | Determine whether results are specific to the chosen penetrator. A material or tip change should be treated as a protocol change. |
| 5. Orientation and penetration-path comparison | Specify the entry face, nail direction, target location, and penetration depth (mm). Keep nail geometry and speed fixed. | Use a positioning fixture; document cell orientation, dimensions, SOC, starting temperature, and any restraint. | Entry location and path, depth, alignment, voltage and temperature traces, and visible venting, leakage, or fire. | Evaluate sensitivity to test location and improve repeatability. Use separate, clearly defined groups for different orientations or paths. |
| Protocol note: Nail penetration conditions are not universal; the exact procedure and acceptance criteria depend on the applicable product standard, regulation, or buyer specification. These five methods are controlled experimental approaches, not a claim that one set of settings is a universal standard. UN 38.3 transport testing does not include a nail-penetration test. Perform testing in an appropriately equipped laboratory with a documented safety plan. | ||||
Before comparing nail penetration results, buyers should check how each cell was conditioned. State of charge can change available energy, heat release, voltage response, and failure severity. A cell tested at 100% charge is not directly comparable with one tested at 30%. Simple, but often missed.
Specify the target state of charge, charging procedure, rest period, and verification method. Record measured voltage and capacity, not only the charger setting. Let cells rest until readings stabilize; recent charging can leave temperature gradients.
Temperature matters too. A cell taken from cold storage may warm unevenly, even when its surface feels ready. Use a controlled chamber and confirm cell temperature at agreed locations or after a defined soak time. Keep the nail geometry, penetration speed, and fixture consistent. Small differences can shift results.
For procurement, request the conditioning log with the test report. It should state charge level and tolerance, cell temperature, soak duration, sample count, and any outliers.
Nail penetration is destructive and cannot predict every real-world abuse event. It can help compare cells under one protocol, but it is not a complete safety verdict.
Very tidy results deserve questions; cell-to-cell variation is real. Repeat tests can be inconvenient, yet unexplained scatter should be investigated.
Penetration results can change sharply with the point of contact. A test near the center may stress a different electrode area than one close to an edge or tab. For a fair comparison, buyers should define the location clearly, using fixed distances from cell edges and terminals. Mark each sample before testing. Small placement errors matter.
Orientation needs equal care. A cylindrical cell tested across its diameter may respond differently from one tested along its axis. For pouch and prismatic cells, record which face points toward the penetrator and how the cell is supported. Keep nail diameter, speed, penetration depth, state of charge, and temperature consistent. Change one variable at a time when possible. Otherwise, the result gets muddy.
Use multiple samples at each location and orientation, since cell-to-cell variation is real. Record voltage, temperature, venting, and visible damage, with synchronized video if available. A single dramatic failure is not a reliable comparison. That sounds tidy; real cells are not. Fixture pressure and small alignment shifts can still affect results, so document them and treat conclusions as limited to the tested setup. Buyers should review the method with qualified test staff and use appropriate containment, monitoring, and emergency procedures.
Penetration location and cell orientation for failure comparison
The bars show planned test configurations, not measured failure rates or outcomes: a baseline condition; three penetration locations; two cell orientations; a 3 × 2 location-orientation matrix; and that matrix repeated at two state-of-charge levels. Select locations, orientations, state of charge, and test conditions according to the applicable standard and qualified laboratory procedures. Nail penetration testing can cause fire or rupture and should only be performed by trained personnel in suitable facilities.
5 Best Nail Penetration Test Methods for Battery Buyers?
Module-Level Nail Testing for System-Level Safety Assessment
A module-level nail test can reveal how cells, spacing, barriers, and electrical connections behave during a severe local failure. For meaningful comparisons, buyers should review five protocol choices: nail material and geometry, penetration speed and depth, cell state of charge, test temperature, and module configuration. Each choice can change the outcome. Ask for recorded voltage, temperature, visible venting, and fire behavior, not just a pass-or-fail label. Small details matter.
Tips: Compare reports only when test conditions match. Check whether sensors captured temperatures near the penetrated cell and neighboring cells. Confirm the test setup reflects the module’s real spacing and restraints.
Module results can inform system-level safety assessment, but they cannot represent every pack layout or operating condition. Look for evidence of heat transfer, propagation to adjacent cells, and effects on nearby components. Ask how the tested module differs from the intended system, including cooling paths and enclosure features. A clean result is useful, but not conclusive. Real installations vary, and test reports sometimes leave important gaps. A qualified laboratory should control hazards and document deviations from the agreed protocol.
By continuing to browse or by clicking “Accept All Cookies,” you agree to the storing of first- and third-party cookies on your device to enhance site navigation, analyze site usage, and assist in our marketing efforts. View our Privacy and Cookie Policy.